How to Run a Car Stereo Directly Off a Car Battery
Wiring a car stereo directly to a 12V battery can be a useful skill for various reasons. Whether you’re testing the stereo outside of the vehicle, setting up a portable audio system, or troubleshooting electrical issues, understanding this process can be extremely beneficial.
This guide will walk you through the necessary steps to wire a car stereo to a 12V battery safely and efficiently.
Tools and Materials Needed
Before diving into the wiring process, gather the following tools and materials:
- Car Stereo: Ensure that it is functional and has a wiring harness.
- 12V Battery: A standard car battery or a portable 12V battery.
- Wire Strippers: To strip the insulation off the wires.
- Electrical Tape: For securing connections.
- Soldering Iron and Solder (optional): For a more secure connection.
- Connectors: Spade connectors or crimp connectors.
- Multimeter: To check the voltage and ensure proper connections.
- Fused Power Cable: For safety, use a cable with an inline fuse.
Safety Precautions
- Work in a Well-Ventilated Area: Batteries can emit gases.
- Wear Safety Gear: Gloves and eye protection.
- Disconnect Power When Not in Use: To prevent accidental shorts.
Step-by-Step Guide: How to Wire a Car Stereo to a 12V Battery

Step 1: Prepare the Battery
Ensure the 12V battery is fully charged and in good condition. Place the battery in a stable location to prevent it from tipping over. Identify the positive (+) and negative (-) terminals on the battery.
Step 2: Identify Stereo Wires
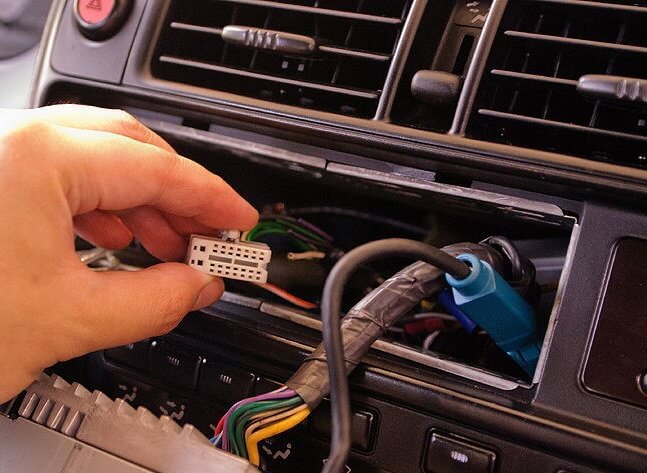
Examine the wiring harness of your car stereo. Typically, the wires are color-coded:
- Yellow: Constant 12V (memory power)
- Red: Accessory 12V (switched power)
- Black: Ground
- Blue/White: Remote turn-on (for amplifiers)
- Orange: Illumination
- Speaker Wires: Usually pairs of the same color with one having a stripe (e.g., white and white/black for front left speaker)
Consult the stereo’s manual for specific wiring information.
Step 3: Strip the Wires
Using wire strippers, remove about 1/2 inch of insulation from the ends of the power (yellow and red), ground (black), and any other necessary wires.
Step 4: Connect the Power Wires
For this step, it’s crucial to have a fused power cable to protect the stereo from power surges.
- Attach the Positive Wire: Connect the yellow wire from the stereo to the positive terminal of the battery. If using a fused cable, connect the fuse holder in line with this wire.
- Connect the Accessory Wire: Join the red wire from the stereo to the same positive terminal. This wire typically activates the stereo when the ignition is on.
Step 5: Ground the Stereo
- Identify the Ground Wire: Locate the black wire from the stereo.
- Attach to Negative Terminal: Secure the black wire to the negative terminal of the battery. This completes the circuit.
Step 6: Secure the Connections
To ensure the connections are stable and safe:
- Use Connectors: Attach spade or crimp connectors to the wire ends for a secure fit on the battery terminals.
- Solder (Optional): For a permanent connection, solder the wires to the connectors.
- Wrap with Electrical Tape: Cover all exposed connections with electrical tape to prevent short circuits.
Step 7: Test the Stereo
Once all connections are secure:
- Turn On the Stereo: Press the power button on the car stereo.
- Check Functionality: Test various functions such as radio, CD player, or Bluetooth connectivity to ensure everything works properly.
Step 8: Troubleshooting
If the stereo does not power on:
- Check Connections: Ensure all wires are properly connected and secure.
- Use a Multimeter: Verify that the battery provides 12V and that the power wires deliver the correct voltage to the stereo.
- Inspect the Fuse: If using a fused power cable, ensure the fuse is intact.
Additional Tips

- Label Wires: If you’re working with multiple wires, labeling can help keep track of connections.
- Battery Maintenance: Keep the battery terminals clean and free of corrosion.
- Portable Setup: Consider using a battery box for a portable audio system to house the battery and stereo securely.
Conclusion
Wiring a car stereo to a 12V battery is a straightforward process if you follow these steps carefully. Whether for testing, troubleshooting, or creating a portable audio setup, this skill can be quite handy.
Always prioritize safety by working in a well-ventilated area and using proper protective gear. With the right tools and precautions, you can successfully wire your car stereo to a 12V battery and enjoy your music anywhere you go.


Leave a Reply